
Click Here for an Index search.
Browse through the Global Instructional Chemistry pages.
Use of Silicon Graphics Workstations
Silicon Graphics Indigo workstations are intended for use with molecular modelling and molecular
biology, programming and 3D visualisation of data produced during project work,
performing crystal structure database searches, use of the Mathematica program
and for electronic-mail. As you enter the department you will be automatically
registered for these systems
Return to index
Check that the workstation monitor is
switched on (the green light glows when it is) and move the mouse around to
deactivate any "screen saver". Type your user identifier, normally something
like BLOGS or JB1, then press the  key located above the shift key on the right hand side of the alphabetic keys.
Enter your password in a similar manner. If these are accepted the following
display should appear. If the login fails, check carefully that you have typed
everything exactly as shown on the registration form. Both identifier and
password are , If a capital letter is indicated,
you must press the shift key to enter it.

You will be left with the Console window and what is called the
"toolchest" menu. Most of what you will need to do can be initiated from
these two areas. In the instructions that follow, a click from say the left
hand button of the mouse will be indicated by a <=.
Return to index
At this point you should
be aware of the conventions surrounding "window management" and how to activate
or "focus" a window.
Since many windows can be "open" on a screen at
any time, certain rules for moving between them and managing them have
evolved.

The department of Chemistry has adopted the standard that the "active" window
is seen in its entirety, and "inactive" windows may be obscured underneath as
seen in the example above. The top window is said to be "raised" with respect
to the bottom. The bar on top of an active window is seen blue. To make a
window "active", a single mouse click is required with the left
hand button. Only when a window is active will anything typed in from the
keyboard be associated with that window. The keyboard is said to be
"focused" on the window.
Return to index
- To "maximise" the window and make
it fill the entire screen, click once with the left hand button on the little
square in the top right hand side of the window. A second click in this square
will return the window to its original size. There is an additional much
smaller square to the left of the larger one which "minimises" the window down.
- Alternatively, point the mouse to the "set square"
 in each corner of the window, press the (left hand) button and "drag" the
corner of the window to a new location. Both the width and depth of a window
can be changed simultaneously by this procedure. Pressing on the vertical or
horizontal outlines of the window will enable only the height or width of the
window to be changed.
- To close a window, perform a double left hand click in the little box on the
top left of a window.
- If the window is too small to entirely display its contents, "scroll bars"
will be visible as strips along either the left, bottom or right hand sides of
the window. A rectangular little marker shows where in the entire viewable area
the current window is positioned. The size of this marker gives some indication
of what proportion of the entire viewable area is currently displayed.
Manipulating this marker is performed with the left hand button "click and
drag" operations. Two slightly different scroll bars may appear (one of each is
shown above). The "winterm" window scroll bars are in the style of "Motif"; the
partially obscured "console" window scroll bars are in the style of
"X-windows".
- Sometimes, a small window may be completely obscured by a larger active
window on top, just like a very cluttered desk! To find out what is underneath,
you will need to move the entire window, without necessarily resizing it. Point
to the blue strip, where the legend "winterm" in the above example is located
and move the window.
Return to index
This is used for "command line" style
interaction with the UNIX operating system of the workstation. In particular,
errors and messages from the system appear in this window. Note that the
default state of this window is "minimised", and that to make it usable, it has
to be expanded by clicking in its area with <=.
Return to index
This residues permanently on the left hand side
of the screen. It serves as the primary menu for all documentation and
applications specific to
the chemistry department.

Return to index
These are available by clicking with
<= on Applications in the Toolchest menu. The main applications
available are; SYBYL,
MacroModel, Explorer,
Quest (X-ray)
and Mathematica.
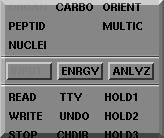
To illustrate a typical application, the procedure for invoking MacroModel is
shown here. Move the mouse cursor over from Applications to
MacroModel and release. After a few seconds, a mobile outline of a new
window appears on the screen which has to be "placed" somewhere on the screen
by moving the mouse cursor and clicking with <=. You will probably want to
place it near the top left of the screen. Identify the terminal as 2 (3D
Silicon graphics) and press the  key. If on a Macintosh using MacX, or if you are connected to a remote Indigo
(see 3.4.3) identify as 1 (2D X Windows) and press the
 key. Several more windows will appear automatically, ie they do not need
"placing". To exit from Macromodel, select STOP in the buttons menu.

Return to index
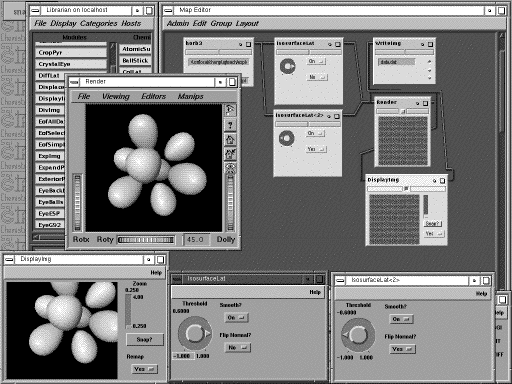
This represents a sophisticated 3D visualisation tool
which can be customised for almost any application. One such "object oriented
tool" already present is labelled HORBS. Its prime use is to visualise hydrogen
orbital wavefunctions which have previously been calculated from a custom
program written as one of the projects in the programming course. This module
takes a simple file containing numerical data and "visualises" it in three
dimensions. Numerous other modules are available.
Return to index
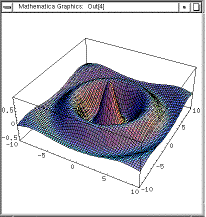
Mathametica is another visualisation package for numerical
processing. Run one of the pre-programed noteboooks from the application menu. You can also
try one of the
following functions at the Mathematica prompt;
Plot3D[Cos[Sqrt[x^2 + y^2]]*Exp[-Sqrt[x*x + y*y]/5],
{x,-10,10},{y,-10,10},PlotPoints->60]

or
Plot3D[0.5x^2 + 0.5y^2 +0.8/Sqrt[(x+0.2)^2 + y^2] +
0.2/Sqrt[(x-0.8)^2 + y^2],{x,-1.5,1.5},{y,-1.5,1.5},
PlotPoints->60]
or
Plot3D[Sin[x] Sin[y] x y,{x,-Pi,Pi},{y,-Pi,Pi},PlotPoints->50]
or
<<Graphics`ContourPlot3D`
ContourPlot3D[Cos[Sqrt[x^2+y^2+z^2]],{x,-2,2},{y,0,2},{z,-2,2},
Contours->{0.25,0.5},ContourStyle->{{RGBColor[1,0,0]},
{RGBColor[0,1,0]}},Lighting->False]
The last plot produces effects similar to Explorer, although unlike
the latter, the image cannot be rotated in real time. You can of course enter
your own function in a similar manner.

Return to index
This item invokes a so-called World-Wide Web browser. The currently preferred
browser is called Netscape, although other programs such as Mosaic or WebRouser are also available.
From this starting point, you can browse the
departmental information systems, or go further afield! Already in 1995, many sources
of chemical information on the Internet were available, which if you have
time you may wish to explore. A good starting point is
here or here.
Please note that you should use the World-Wide Web responsibly. There are a number of sites out
there in "cyberspace" which contain material that by no stretch of the imagination could be construed
as being appropriate for a chemistry course. If you are seen displaying offensive or inappropriate
materials, this could result in disciplinary action being taken. Please consult the code-of-conduct
which should be available on the computer room walls for further details.
Return to index
The next item in the Toolchest menu shown above enables
you to connect from the workstation you are currently working on to another
such system. You may wish to do so because the "CPU" on your own machine may be
working hard at a problem, leaving you with a slow response. By connecting to
another computer which may be idle, you could take advantage of the capacity on
that machine. It is possible also that particular programs with restricted
licenses may only be available on one particular machine, or that another
machine has some hardware facility that your own system does not. After
selecting a workstation, you will be asked to login, and a console type window
on the remote machine will become available.
Return to index
These devices are normally
connected to the ethernet and must have a suitable program
implemented such as Telnet or X-Windows.
Using X-Windows.
The windows that can be created directly on a
workstation screen can also be "exported" across a network and appear on a
Macintosh screen. To do this, a program called MacX must be running on the Mac.
To create the file editing and terminal window using MacX, run
edit-a-file from the Remote workstations menu.
Whilst graphically non-intensive tasks such as editing a performed perfectly
adequately, those that require high performance graphics, such as Explorer,
cannot be invoked in this way.
Using Telnet.
This really represents a sub-set of what is
possible under X Windows. Only the equivalent of a console window for the
Indigo workstation can be created on the Mac. Nevertheless, it is useful for
finding out what files you have etc, provided you are prepared to enter Unix
style command lines.
Return to index
These are useful functions you may wish to invoke any
time whilst running another program.
Used to create new programs and datafiles
as part of the programming course.
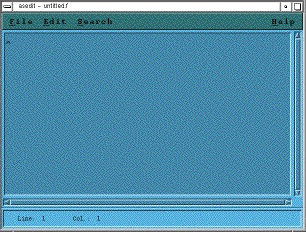
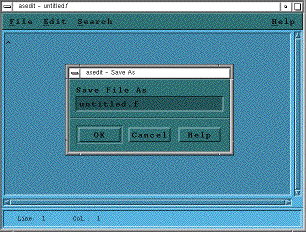
Invoke Edit-a-file, whereupon the outline of a new window appears which
has to be "placed" by clicking with the lhs mouse button <=. Within this
window the "user interface" follows the same guidelines as a Macintosh
computer. Text can be selected, copied to a "clipboard", cut or pasted and to
help you do this, "pull-down" menus can be invoked by locating the mouse over
them. In the File menu, files can be opened, saved etc. Most
importantly, be aware that anything you type in this window will have to be
saved before it can be used by another program such as a compiler. When saving
a file, you have to inform the operating system in which directory the file
will reside. You should adopt the working practice of saving the file every
few minutes or so in case a computer crash occurs and you lose all your work.
Save should also be invoked before attempting to compile the program. The
Edit menu contains the usual options for manipulating text and
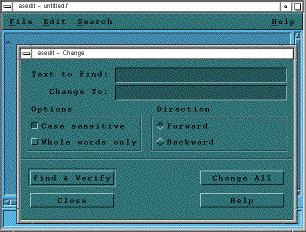
Search has text locating utilities. Finally Help is similar to
the ballon help item on a Macintosh.
Return to index
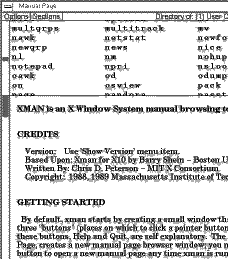
If you want help on any Unix style
command, the Manual pages can be invoked;
Return to index
This creates a new console like command line window.
It differs from the Login window in being associated specifically
with the workstation you are using, and from the Console window in not being
the recipient of system error and informative messages. As many windows as you
can cope with can be so created. The reason for doing this is you may wish to
reserve one window for say compiling a program, a second specifically for
running it, and a third perhaps to check disk space usage and other
book-keeping tasks.
Return to index
Logout.
Fairly self-explanatory. Never switch the workstation base unit. Sometimes
a program called "Window manager" can crash, resulting in your
workstation screen "freezing up", making it impossible to
log-out. The best advice is to simply leave it in this state. It
does not represent a security hazard, since only the system
manager can clear this state.
off.
Return to index
Sometimes, so many windows can be open
simultaneously that it is easy to get lost. The windows menu offers several
options for finding ones way around lost windows. Perhaps the most useful is
Minimise all, which reduces all the windows to something that looks like
this;

From here, click on the window that you do want to open it up.
Return to index
Ywo programs for reading e-mail are available. By default, the Toolchest
invokes "elm". Some people prefer another called "Pine". These are excellent for sending
simple text based messages. Another method of sending
(but not receiving) e-mail is to use the so-called "mailto:blogs@somewhere"
URL in the Netscape browser. If you are reading this in Netscape,
try clicking on the above hyperlink to see how it works. If you want to "attach" a document with
your e-mail you should use Eudora available on the Macintosh systems.
If you want to send a message, you will automatically
enter the text editor described above in order to compose your message.
Most e-mail messages "date" fairly quickly. You should get into the
habit of deleting old messages, and also saving the particularly important
ones elsewhere. It is surprising how much disk storage space e-mail messages
can occupy. If your mailbox is occupying significant amounts of space
(> 1 Mbyte), it may be unilaterally (and unselectively) purged for you!
Mail Lists
There are many so called subscription e-mail lists on the Internet. It
is very simnple to join these, but once you do, you run the risk of
receiving large amounts of unsolicited e-mail.
Some e-mail lists even post
weekly newsletters in Postscript form which can each be 200-300k in size.
Unfortunately, whilst
people find it easy to join lists, they somehow never seem to bother
to leave them. The consequence is that a large number of e-mail messages
continue to be received by registered users in the department, sometimes
after they have graduated and left. There is no restriction on joining
subscription lists, provided you delete messages after you have read them..
If this is not done, you run the risk of having your account invalidated.
You are reminded that your
e-mail account is a privilege which should not be used to bring yourself,
the department or the College into disrepute. In particular, using e-mail
in an offensive manner, or transmitting inappropriate pictures could result
in disciplinary action. If you are unsure where you stand on these matters,
consult the formal notice which should be pinned to the computer rooms.
Click here for further details of e-mail
Return to index
Unlike a Macintosh, all printing is achieved
by writing out a plot file to disk and then using a "post-processor" to send it
to a plotter. You have three options at this point.
- SYBYL, MacroModel, Quest and other programs have Plot or Print
options, which when invoked request the name and possibly type of plot file you
wish to save. Normally this will be a "Postscript" file which can be sent for
printing in the following way;
Enter a console or shell window and type;
iron$ deskplot bloggs.ps
iron$ deskq
(for information on the state of the queue)
The output will appear on the HP Deskjet in room 337. Since colour printing is
very expensive, you must not generate more than 1-2 plots. If you want to do a
lot of colour printing, you will be asked to provide your own colour ink
cartridge. There are also some high quality colour postscript printers which
can be used, but only in consultation with Henry Rzepa.
- You can create a screen "snapshot" of any portion of the screen and
save this as a "rgb" file. To do this, type at a prompt;
iron$snapshot
and place the small rectangular outline somewhere which will not obscure your
desired image. Place the mouse cursor over the snapshot icon, and press the lhs
button once. Next, press the shift key, and keeping it pressed, move the
cursor to the top left hand side of the image you want to capture. Press the
lhs button and "drag" the outline that appears to the bottom right hand side of
the capture area. Release the lhs button. Now return to the shapshot icon,
activate it with the lhs button, and then press the rhs mouse button. A menu
appears, the top item of which will perform the image capture. The file by
default is given the name snap.rgb and can be processed as described
below. You can also change its name within the same menu. Explorer also
produces such rgb files from its own internal "snapshot" module. Such files can
be printed using a different utility which first converts the rgb file to
postscript, adds a header so that you can identify your own output and then
sends it to the printer. To invoke this mode type;
iron$ugplot bloggs.rgb
(note that the .rgb qualifier must be present).
- Both .ps postscript files and .rgb files can be transferred to a Macintosh
computer and processed there. A .rgb file must first be converted in the
following way;
iron$tp bloggs
This produces a file called bloggs.pict, which is now transferred to a
Mac using the Fetch program (remember to set the file type to binary and the
file type to PICT) in the Fetch menus that appear). The file can then be opened
using Teachtext, or other word processors or graphics programs. All the
"snapshots" in this document were processed in this way.
Return to index
If the workstation is not responding correctly, or at all,
you should report the problem to
Sue Johnson (4567) or Henry Rzepa (45774),
quoting the name of the system. This is indicated on the little blue sticker on
the screen. Each system is named after an element to help you remember! If it
looks likely that you will be the last user at night, the monitor can be safely
switched off to conserve electricity. DO NOT however power the system unit in
the indigo coloured box.
Return to index
Copyright (c) H. S. Rzepa and ICSTM Chemistry Department, 1994,1995.


 key located above the shift key on the right hand side of the alphabetic keys.
Enter your password in a similar manner. If these are accepted the following
display should appear. If the login fails, check carefully that you have typed
everything exactly as shown on the registration form. Both identifier and
password are , If a capital letter is indicated,
you must press the shift key to enter it.


 in each corner of the window, press the (left hand) button and "drag" the
corner of the window to a new location. Both the width and depth of a window
can be changed simultaneously by this procedure. Pressing on the vertical or
horizontal outlines of the window will enable only the height or width of the
window to be changed.

 key. If on a Macintosh using MacX, or if you are connected to a remote Indigo
(see 3.4.3) identify as 1 (2D X Windows) and press the
 key. Several more windows will appear automatically, ie they do not need
"placing". To exit from Macromodel, select STOP in the buttons menu.


