Coordinates:

The most important windows in MacMolPlt are:
Each of these windows can be opened or brought to the front (the Main Display window can not be closed without closing the file) through a pull- down menu from the Windows menu. Each file that is opened has its own set of windows.
The main display is the master window for each file (or unsaved set of data). It is where the molecule is displayed along with normal modes and surfaces. At the bottom of the window on the left MacMolPlt prints out the energy and/or the current frequency. On the left is a scroll bar which indicates which frame in a series of frames is being displayed. In the main part of the window is the molecule display.
Tips on rotating and translating: To rotate the display click the mouse in on to the molecule and hold the button down. Simply move the mouse around to rotate the molecule. To zoom the display hold the shift key down while moving the mouse up or down. To translate the molecule hold the command key (apple key) down while moving the mouse. Holding both the shift and command keys to translate into/out of the screen.
Prehaps the biggest factor effecting molecule display is the use of QuickDraw 3D. QuickDraw 3D is a cross-application and cross-platform 3D interface providing 3D drawing with lighting, shading and texture mapping all in software or (where available) accelerated in hardware. Currently this library is only available for PowerMacintosh computers with 16 or more Mb of real RAM and for best performance you should use 16 or 32 bit color. If you would like to try out MacMolPlt with QuickDraw 3D you must first install the QuickDraw 3D shared library available from Apple.
MacMolPlt checks on startup for the presence of QuickDraw3D, if it is present then a QuickDraw3D option will be available from the display menu. When activated all molecule display will be done with QD3D. While QD3D is activated you will notice a large increase in the size of the system heap which is where the shared library and all QD3D data are stored. The only time when a large chunk of memory in MacMolPlt's application partition is needed is when a QD3D image is copied. At that point the QD3D object is copied such that if you paste into a QD3D aware application you will still be able to rotate and translate the molecule! If the required amount of memory is not available then you will only copy a 72 dpi PICT instead of the QD3D object. For better printout I suggest use the Export to hi-res PICT option and then import the file into the other application. This will provide good quality when printed out later.
Version 4.0 and later is capable of generating transparent surfaces using QuickDraw 3D. However, in order to view transparent surfaces you must have either a hardware QuickDraw 3D accelerator or a plugin renderer which supports transparencies (the interactive renderer does not). Beware that all hardware accelerators are not created equal. In particular many third party accelerators work only when drawing to the screen, thus you can view transparent surfaces, but you can not copy or print them! Apple's accelerator card is one card which will

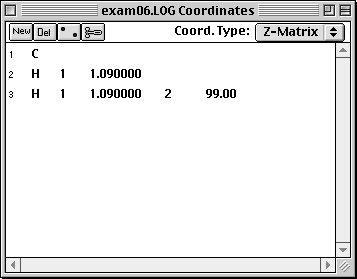
The coordinates window displays the current set of coordinates for the current frame. The coordinates can be displayed as cartesian coords or as gaussian style internal coordinates (as shown above). To edit any value simply double click on that value. The Main Display will be updated as soon as you finish typing and hit return or tab or click outside the edit field. The controls at the top of the window do the following (in order from left to right):

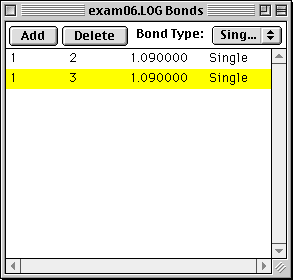
The bonds window allows you to add or delete bonds or change the bond type. The bond type has no signicance to MacMolPlt other than the color and pattern used to display the bond. The color and pattern for each bond type can be modified in the Preferences window.
The energy plot is a simple window to display the energy for each frame relative to that for all other frames. Look in the preferences dialog for options to plot the kintic or potential energy and the MP2 and total energy. You can also change the energy units and define a reference energy to use as the zero energy. Colors and indicator size can also be defined.

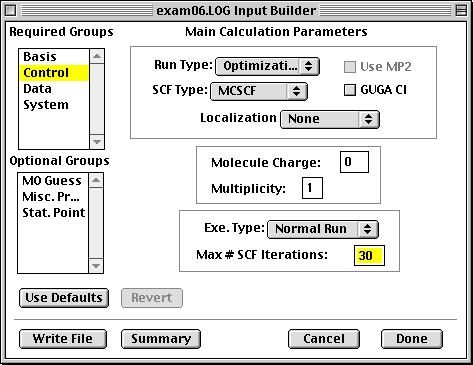
The Input Builder window allows you to setup many of the options needed to create a simple GAMESS input file. Many of the GAMESS groups and options are not yet present, especially for more advanced options. There is balloon help for most options, so the best way to get started is to turn on balloon help and then look around at the different items. All of the options which are visible are implemented, but there may be options which are unavailable in the input builder, but still needed to get a correct GAMESS run.
The basic design of the input builder window is that the most important input options (the required groups) are listed at the top left of the window. These are groups that you should always check before creating an input deck. The second list contains groups for which the defaults are generally adequate (thus they are optional). These lists are not constant. New groups are added and removed depending on options you select. For instance, if you select an MP2 wavefunction type then an optional MP2 group will be added to the optional groups list.
Once you have selected all of the options that you need you can click the "write file" button, which will prompt for a file name to write the GAMESS input file. All of the options which you have set will be written to the file, but options which are unchanged from their GAMESS defaults are skipped. The coordinates for the current frame will be punched out into the $DATA group. You should examine the resulting input file and make sure that all required options are present.

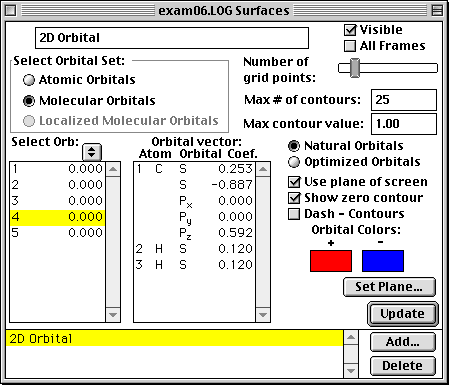
The surfaces window allows the create/deletion and modification of all supported surface types. For information on specific surface options refer Surfaces Page. There are several controls common to all surface types. The common functions are:
A great many features in MacMolPlt are customizable. Each file has its own set of preferences which are inherited from the global default preferences (set using the Default Preferences menu item in the Edit menu). You can then modify these preferences to suit your own taste. These include atom colors and patterns, atom sizes on to QuickDraw 3D renderer. Look through the panels with balloon help on to find out what each control does.